Are you interested in Deep Learning but own an AMD GPU? Well good news for you, because Vertex AI has released an amazing tool called PlaidML, which allows to run deep learning frameworks on many different platforms including AMD GPUs. Basically it provides an interface to Tensorflow GPU processing through Keras API and quite frankly it’s probably the easiest method availabe.
Detailed information about PlaidML can be found at this github link. Currently supported hardware is shown as: 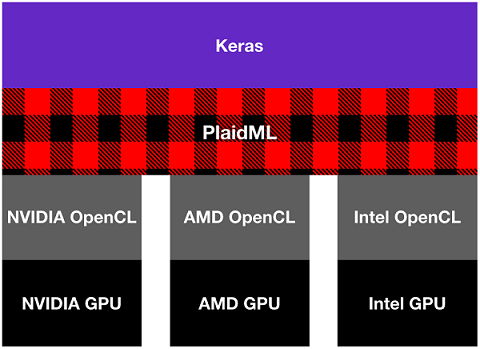
My Machine Configuration
I am running Windows 10, Anaconda( Python 3.7 ) on a laptop with AMD Radeon M470. For the sake of simplicity, I have not created a new anaconda environment for installing packages.
Step 0: Install Tensorflow and Keras
First of all you need to have Tensorflow and Keras APIs installed. You can install them on Anaconda using the following commands in Anaconda Prompt( run as admin ). In order to install Tensorflow on Anaconda as easily as possible, you should have Anaconda with Python version 3.7
conda install -c conda-forge tensorflow
conda install -c conda-forge keras
Step 1: Install PlaidML
If you are using Anaconda, then open up Anaconda Prompt and run the following command.
pip install plaidml-keras plaidbench
It should get installed without any issue.
Step 2: Run PlaidML Setup
After the packages have downloaded and installed. PlaidML needs to configure itself according to the hardware. For this purpose, we have to run the plaidml-setup.exe . For this purpose, open the Anaconda Prompt, and run the following command.
plaidml-setup
When you run it, the setup demands you to select the primary device on which you will run the tensorflow. It gives you all the options available from your system forexample your CPU, GPU and a warning that experimental devices can cause issues. You can check if your device is supported or not from the above link in the introduction section. On thing though, even if your GPU is not supported, its a decent probability that there won’t be issues and it works anyways. From the available options you should selected the one that has term “amd” in it. The complete scenario is shown in the following image.
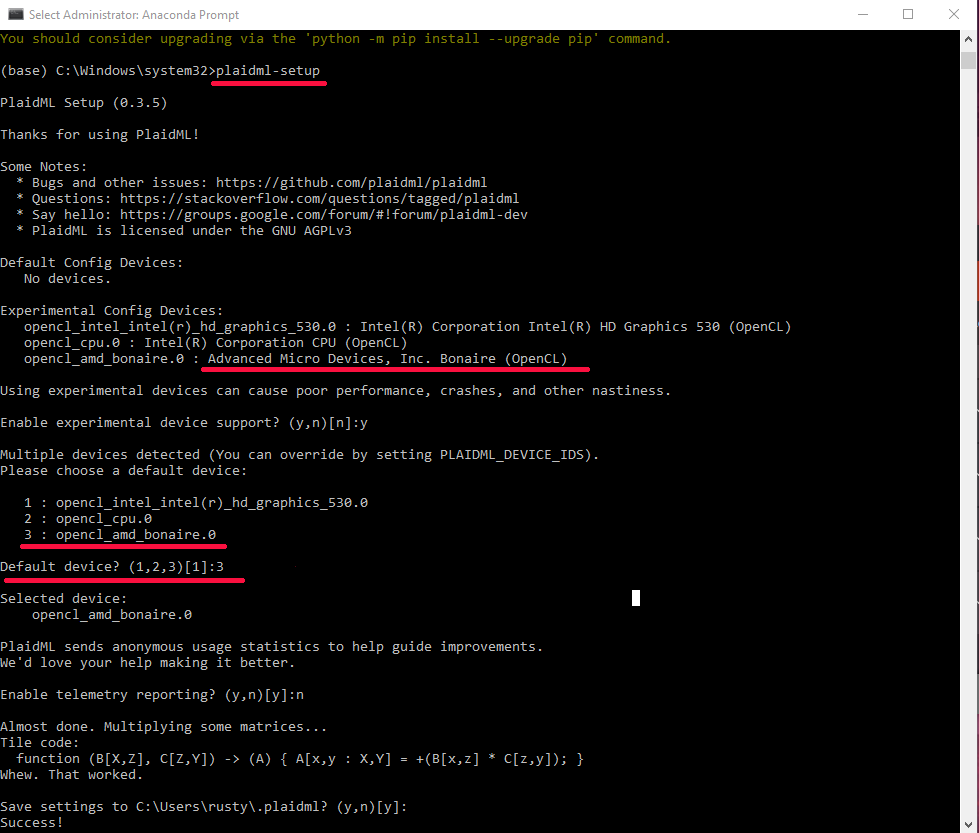
It might not be visible clearly, but I have selected the 3rd option as default processing device as its the AMD GPU.
Step 3: Running the Code
So now that we have completed the setup and configuration, lets test the PlaidML in our jupyer notebook. Follow along with me. First run the following cell.
You have to add the following lines to the top of your code(before importing keras and tensorflow ).
# Only 2 lines will be added
# Rest of the flow and code remains the same as default keras
import plaidml.keras
plaidml.keras.install_backend()
Then you can import other libraries.
# first lets import the useful stuff
import tensorflow as tf
import keras

# import other stuff
from keras import backend as K
import numpy as np
Now if you have any Keras code, you can try it out without changing anything in it. If not then follow this sample code on how to run CNN with Keras. In order to test on CPU, just remove the 2 lines that import plaidml and its backend.
Performance Difference
I created a CNN on CIFAR10 dataset and its training on CPU( meaning without PlaidML ) took about 460 minutes for 10 epochs( ~ 46 mins per epoch). When I got fed up of this, I installed PlaidML and that code took about 10 minutes( ~1 min per epoch ).
Acknowlegement
Really thankful to the vertex.ai team for creating this amazing tool that allows enthusiants like us to perform deep learning without investing alots of time and resources.